Microsoft Entra ID (Azure Active Directory)
Configure SSO sign in for your Microsoft Entra ID organization
In this guide, we're going to go through the process of setting up SAML SSO integration using the Microsoft Entra ID Gallery application for Serenity Connect.
Prerequisites
Before you begin, make sure you have:
Serenity Connect account with an administrator role.
All the required users provisioned in Serenity Connect.
SAML SSO enabled for your Serenity Connect organization.
Contact support (hello@serenityconnect.com) for creating an account, setting an administrator role or enabling SSO for your organization. We can also help you with bulk user provisioning.
Supported features
SP-initiated Single Sign On
(coming soon) Automatic User Provisioning via SCIM
Configuration
If you haven't already, sign in to your Entra ID administrative portal. Once signed in, click Enterprise applications in the left-hand sidebar and then New application near the top of the resulting page.
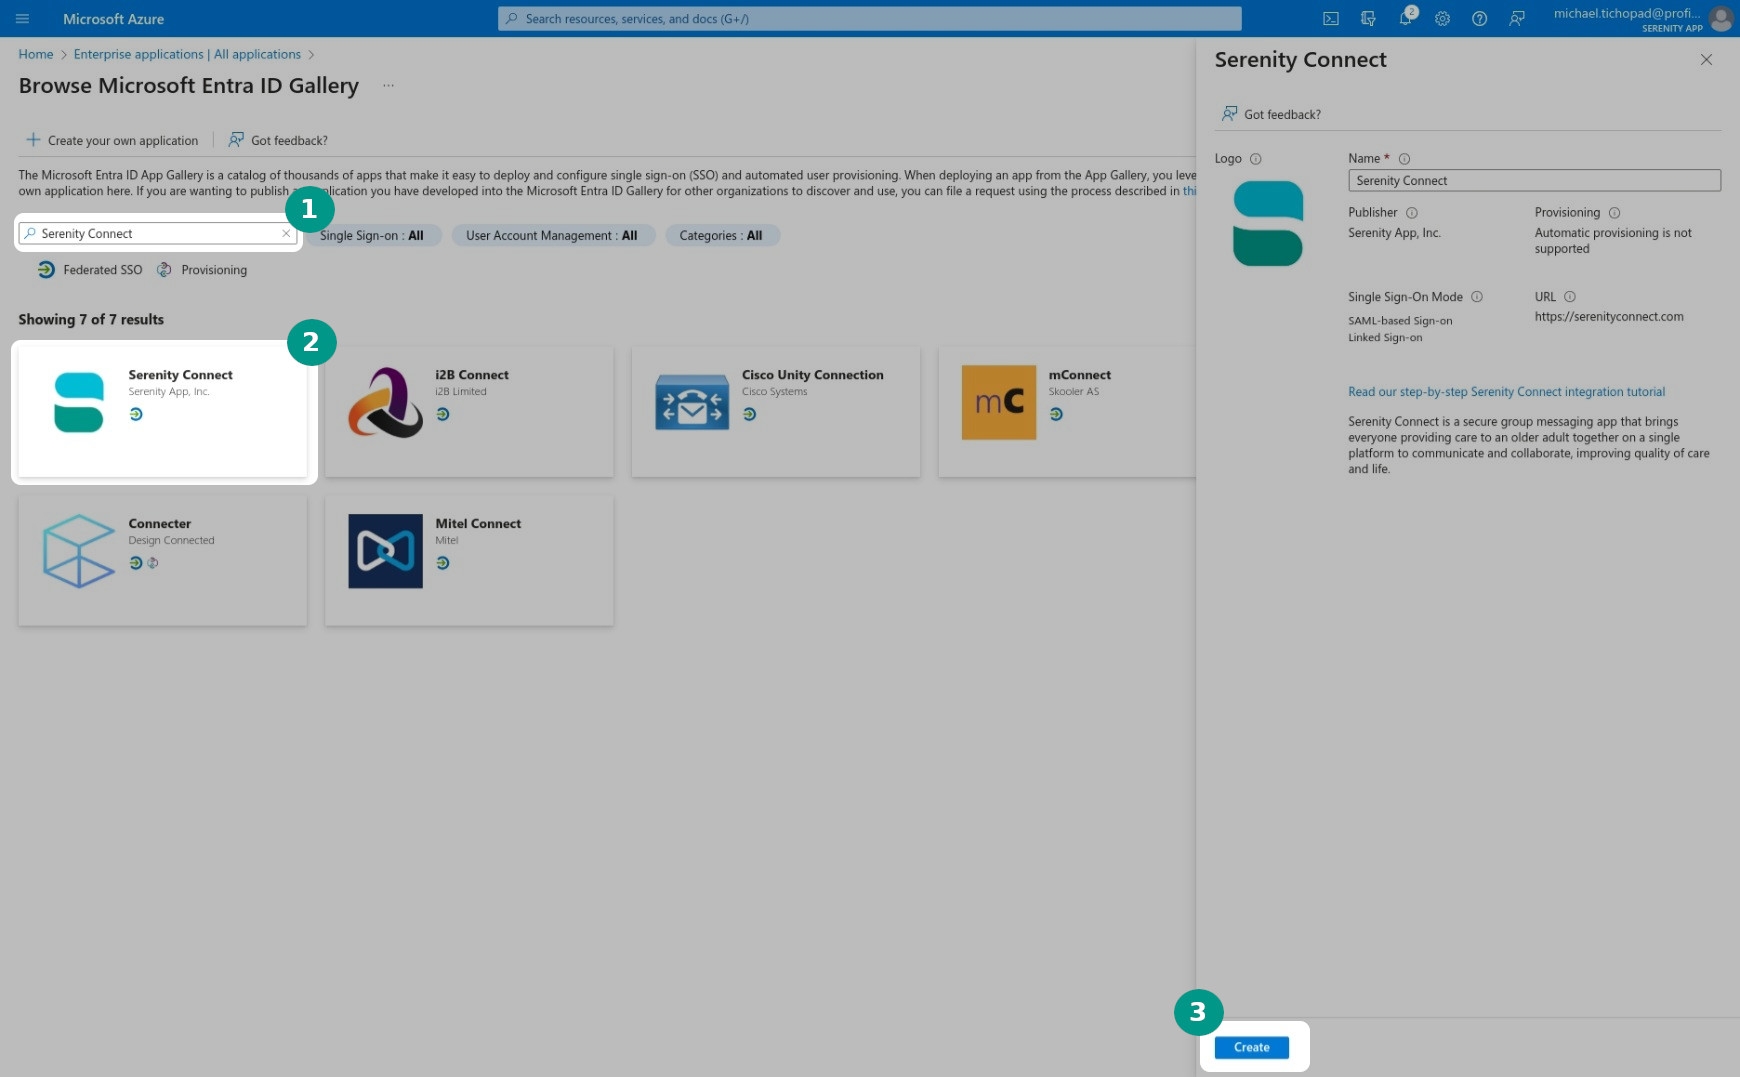
Search for Serenity Connect and click Create to add it to your organization.
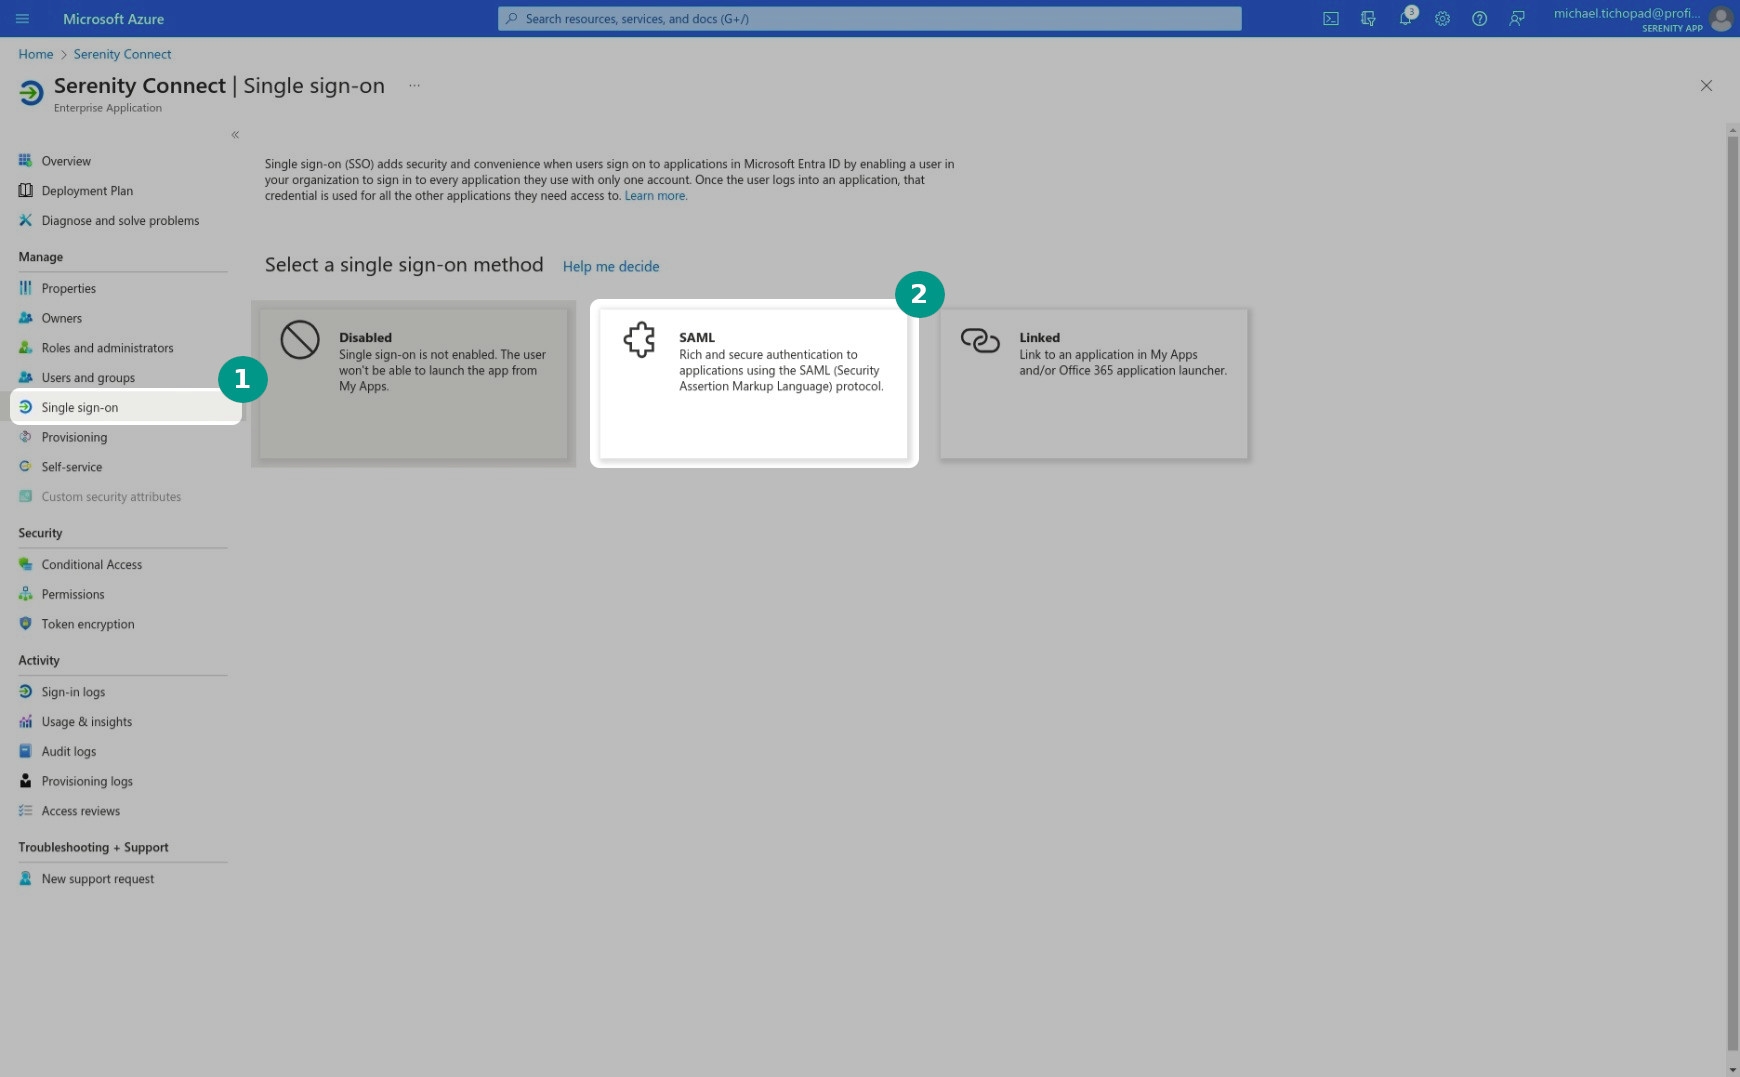
Once the application's installed, click Single sign-on in the left-hand sidebar. Then select SAML as the single sign-on method.
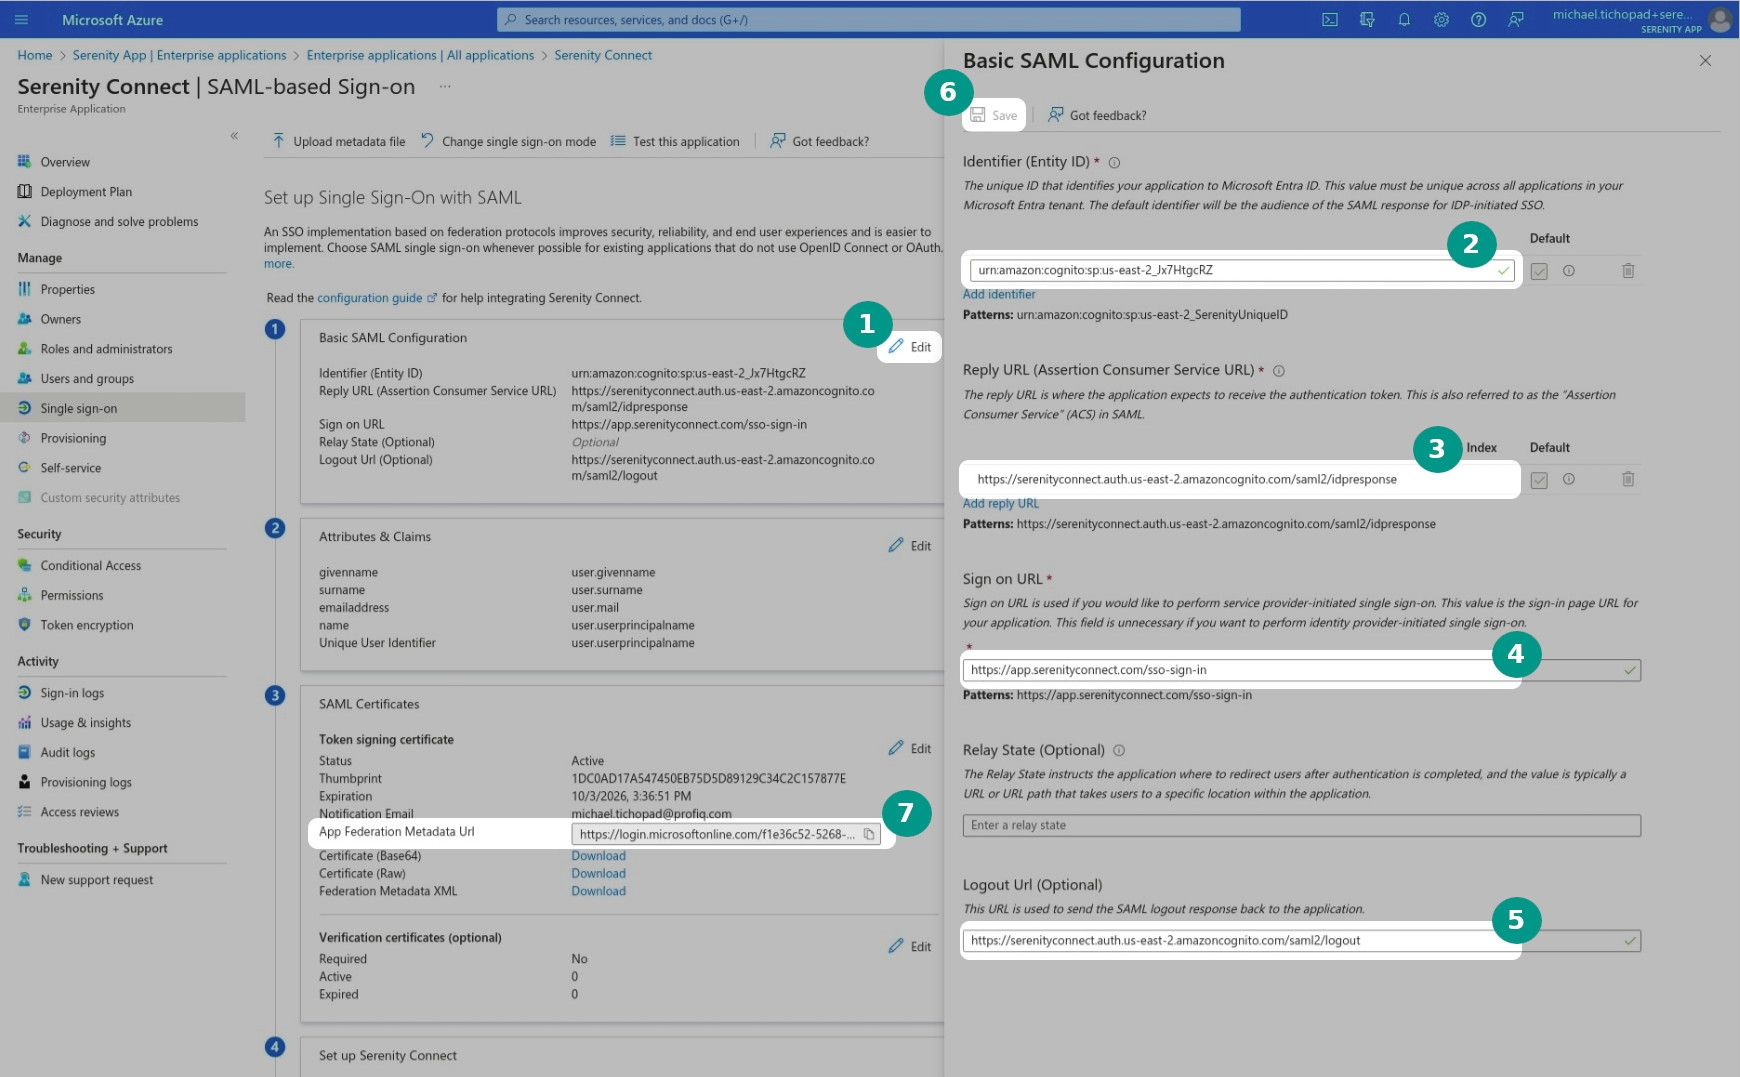
On the resulting page, look for Basic SAML Configuration and click Edit.
Fill the following values in and click Save after you're done.
Now look for the SAML Certificates section and copy the App Federation Metadata Url. Please provide this URL to the Serenity Connect support team along with your request for enabling SSO sign in.
That's it! The configuration's done. You can try it out at https://app.serenityconnect.com/sso-sign-in.
Next steps
Assign users/groups to Serenity Connect
Users and/or groups in your Entra ID organization have to be assigned to the Serenity Connect enterprise application before they can start using SSO sign in. See Entra ID documentation for a tutorial on how to assign a user to an application.
Please keep in mind that Serenity Connect does not support automatic user provisioning yet, so every SSO user has to have an existing Serenity Connect account. See Prerequisites.
Troubleshooting
Error "AADSTS50105"
You might encounter the following error during sign in:
To resolve this, make sure the user trying to sign in is assigned to the Serenity Connect application in Microsoft Entra ID. See Assign users/groups to Serenity Connect.
Getting a "User couldn't be found" error
If you get the "We are sorry but the user couldn't be found." error when trying to sign in, it most likely means the user trying to sign in hasn't been provisioned in Serenity Connect yet (see Prerequisites).
Getting an "Account is not configured for SAML SSO" error
If you encounter the "Your account is not configured to use SAML SSO. Please sign in with a password." error when trying to sign in, it's likely due to SSO not being enabled for your organization in Serenity Connect. Contact support to enable this feature (see Prerequisites).
Getting a "Something went wrong" error when signing in
The "We are sorry but something went wrong. Please try again." error when signing in could be caused by a variety of issues.
Please make sure to go through the following checklist before contacting the support team:
You have a stable internet connection.
The Attributes & Claims section in the Single sign-on settings of the Serenity Connect application in your Entra ID organization has the default values.
Double-check that the setup process went according to Configuration.
If you're having issues trying to sign in with the Serenity Engage mobile app, make sure you're using the latest version.
Last updated